Quick Guides
Content
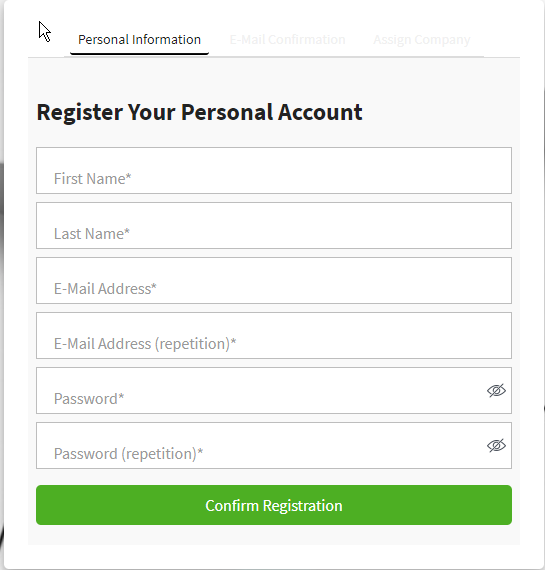
Create personal Account
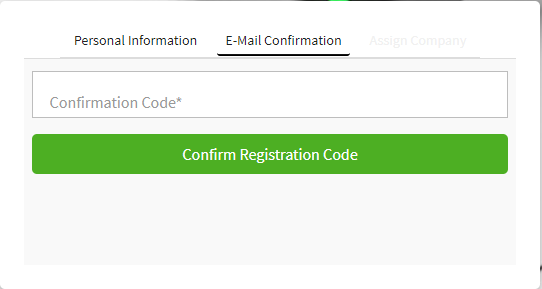
Confirm E-Mail Address
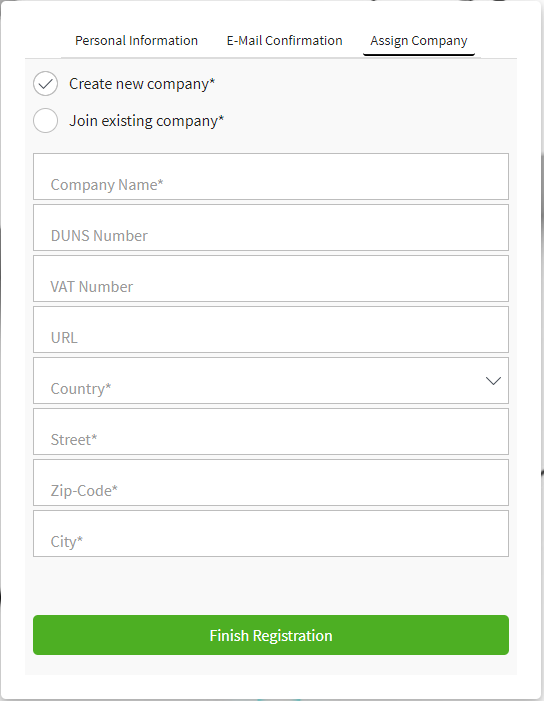
Create/Join a Company
Content
Overview
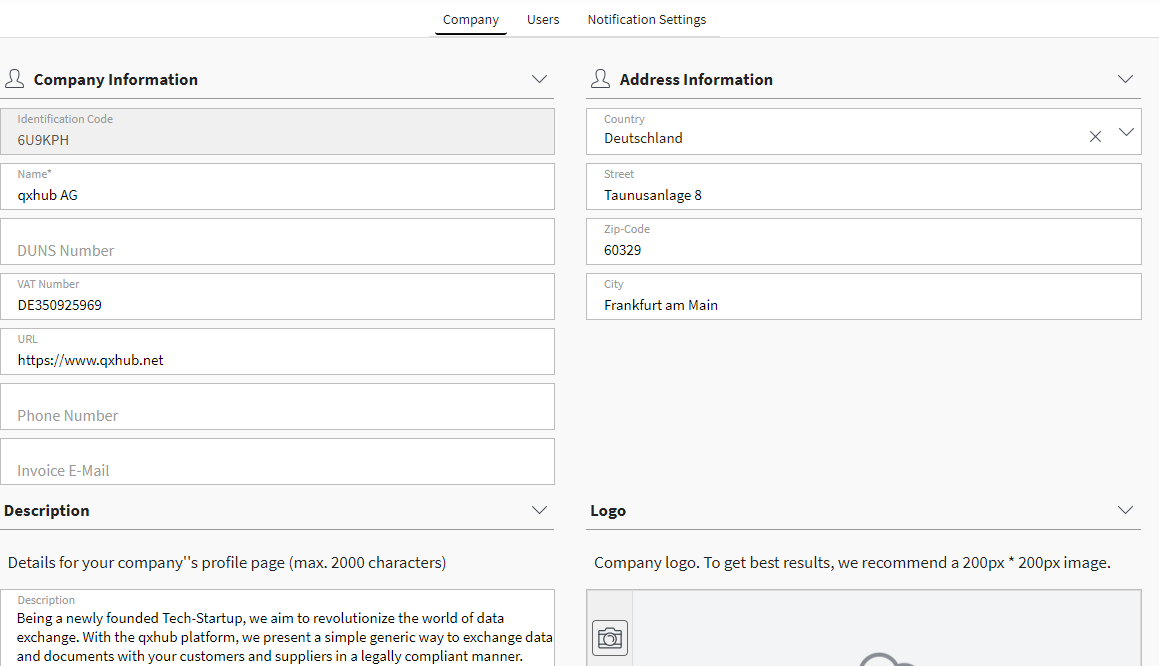
Company Information
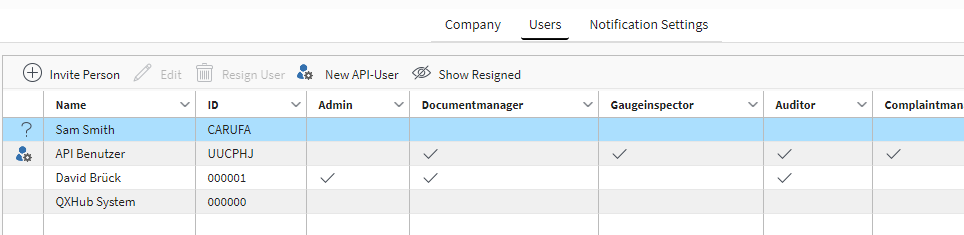
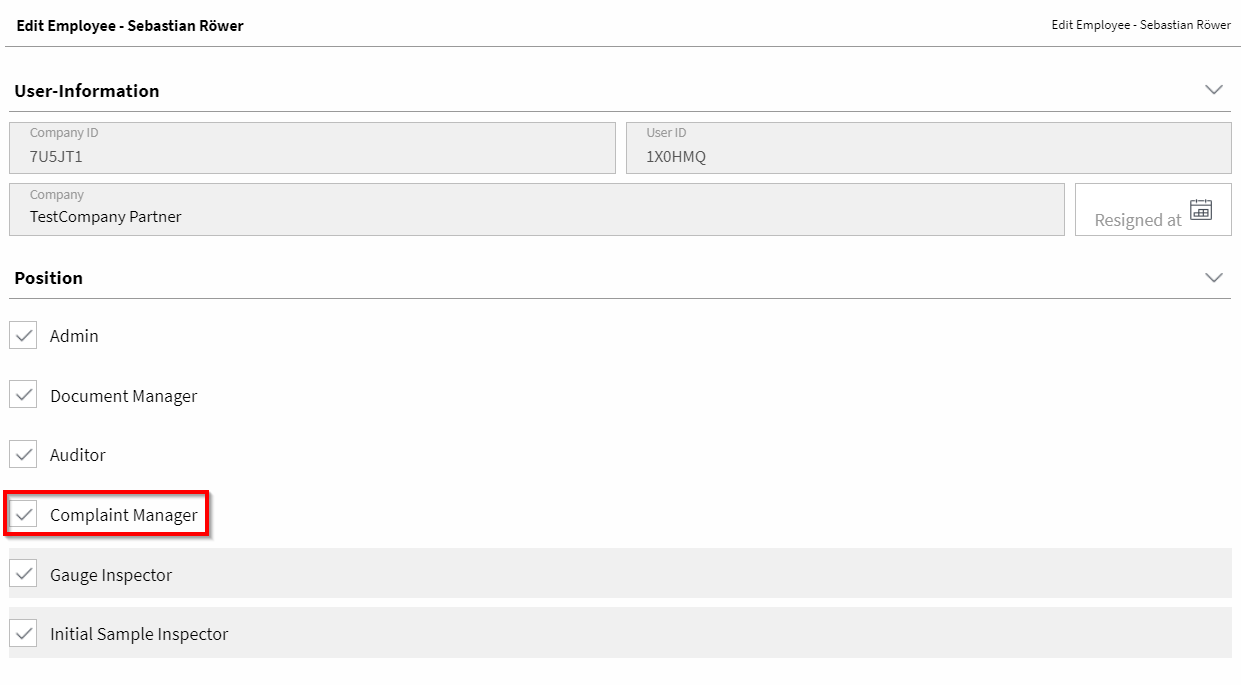
Manage Employees
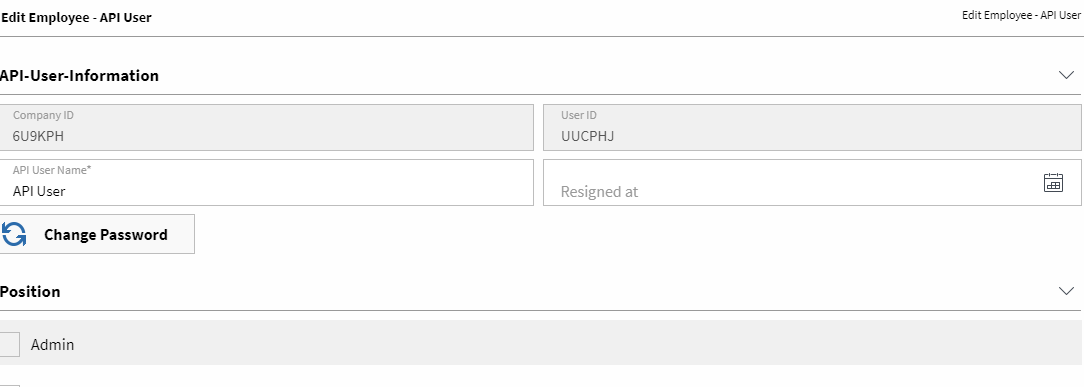
API-User
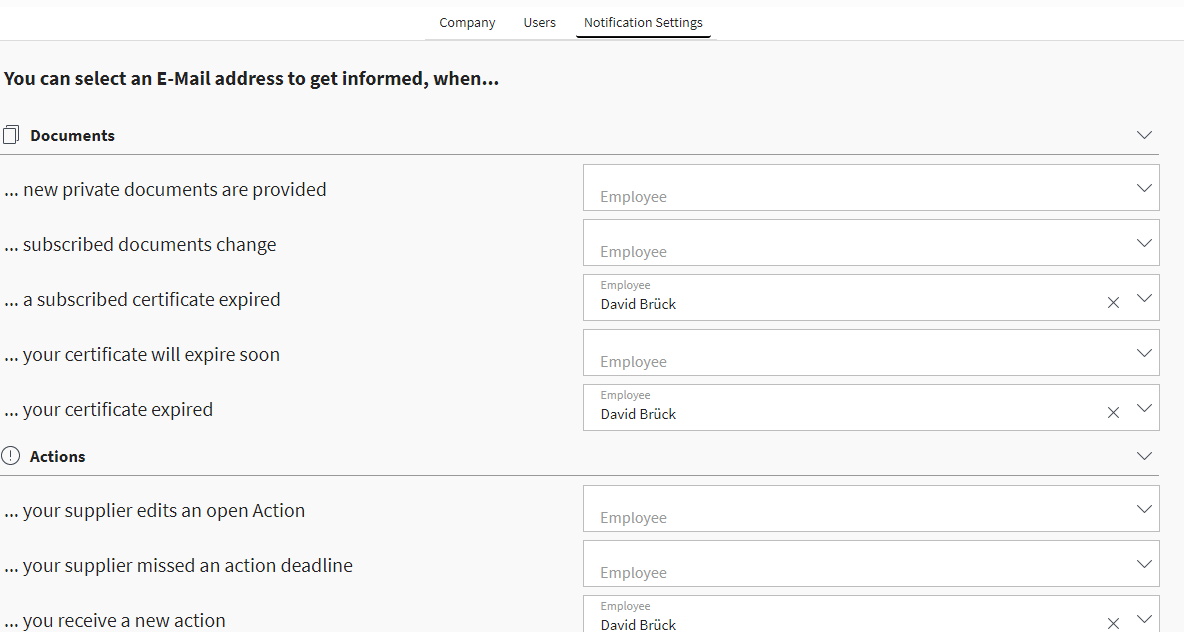
Notification Settings

Content
Handbook
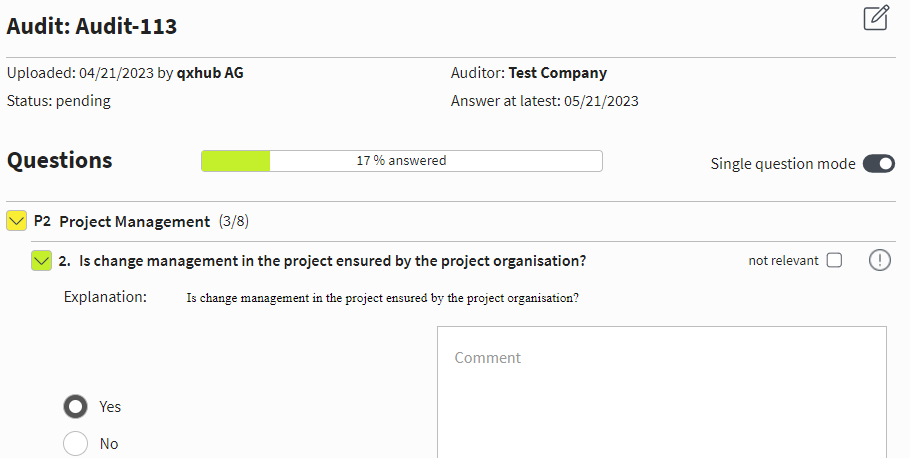
Pick your Audit
Content
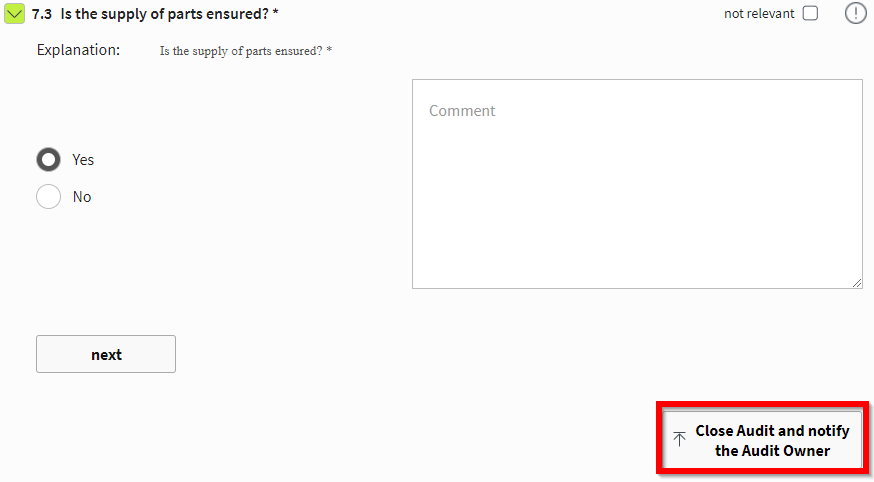
Answer Questions
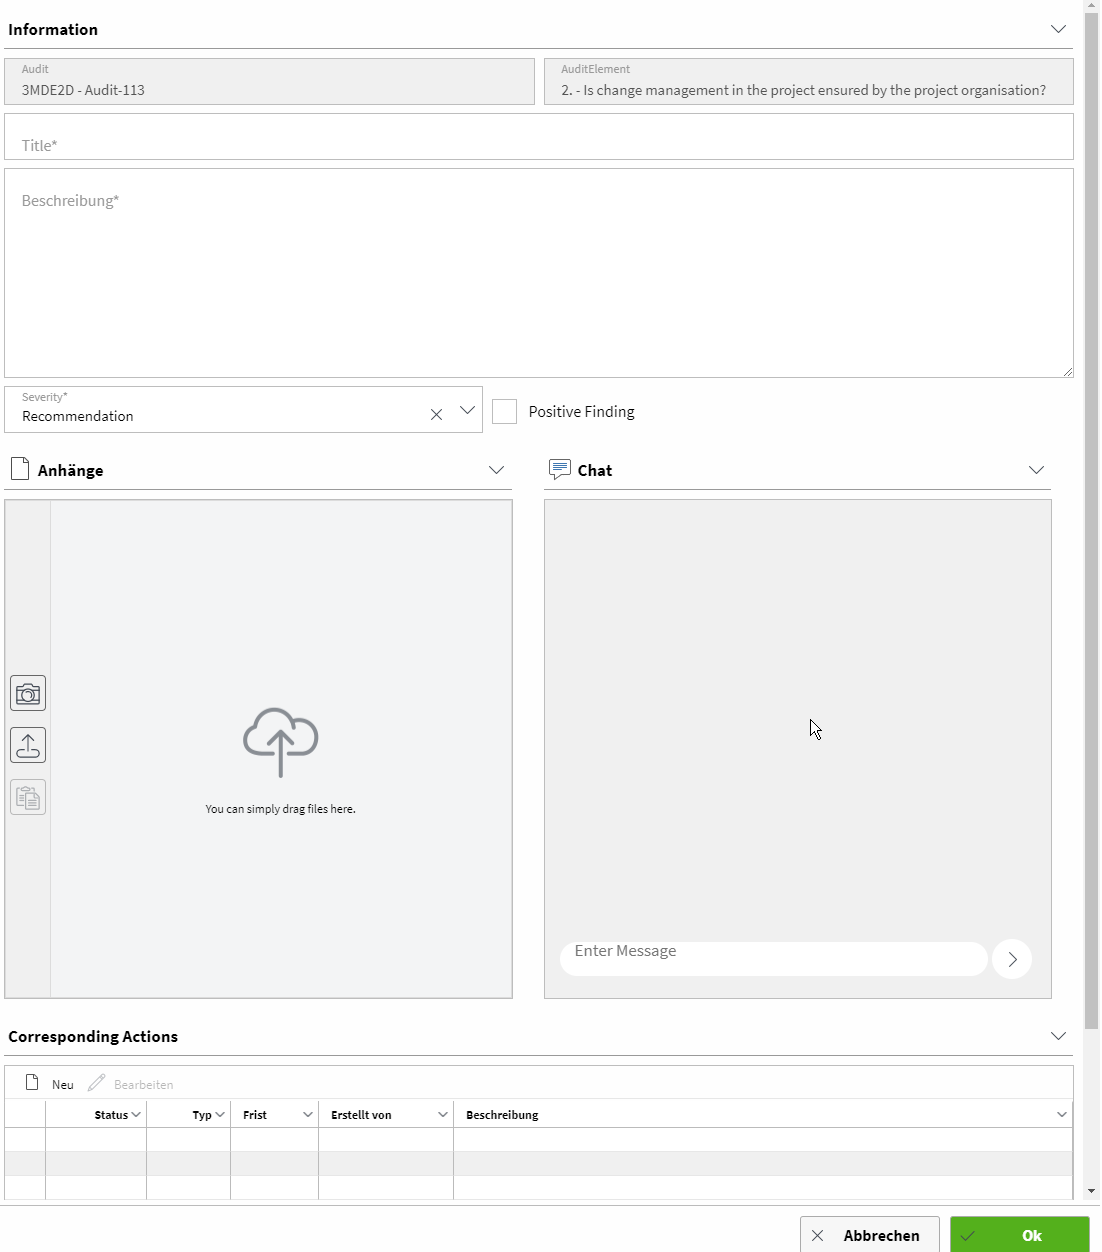
Record Findings
Create Actions
Submit Audit
Content
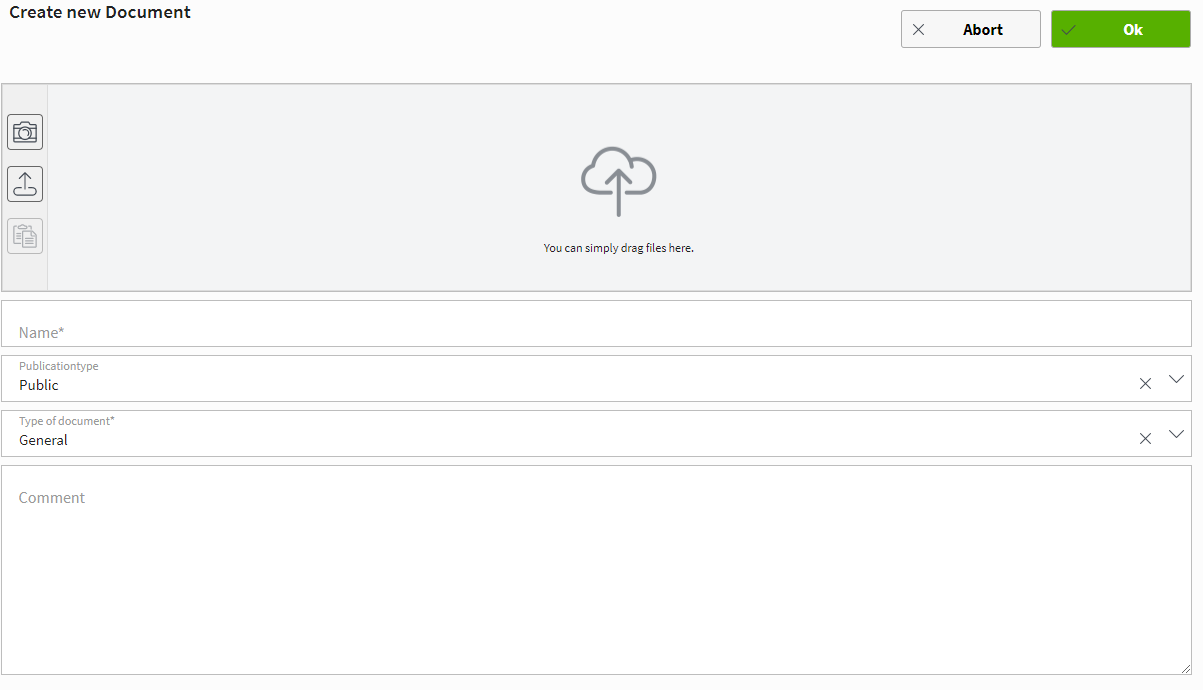
Fill in Document Information
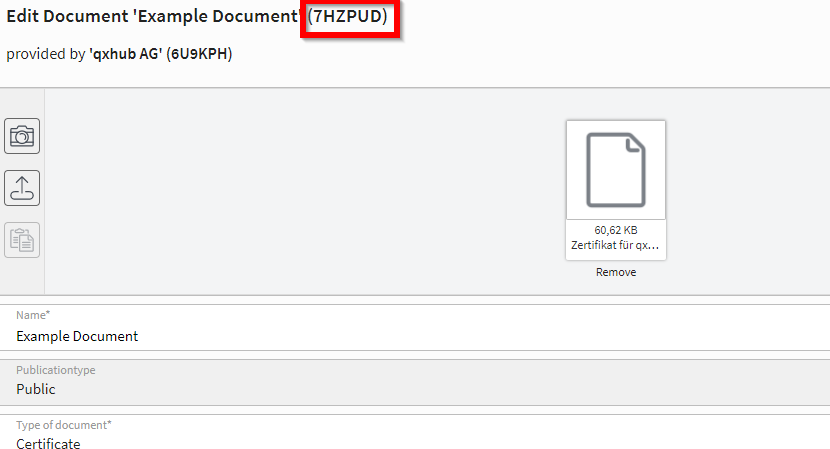
Document-ID
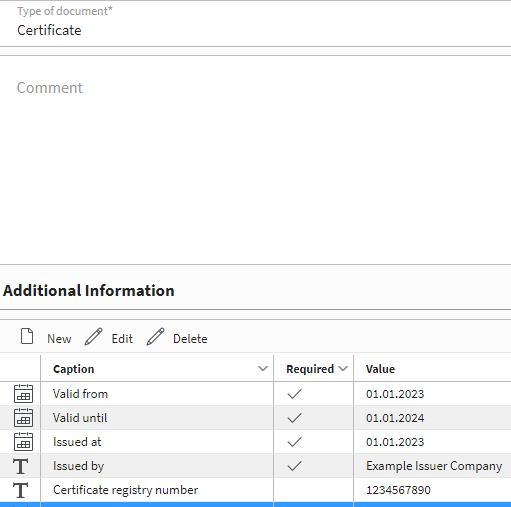
Document Types
Content
Benefits of subscribed Documents
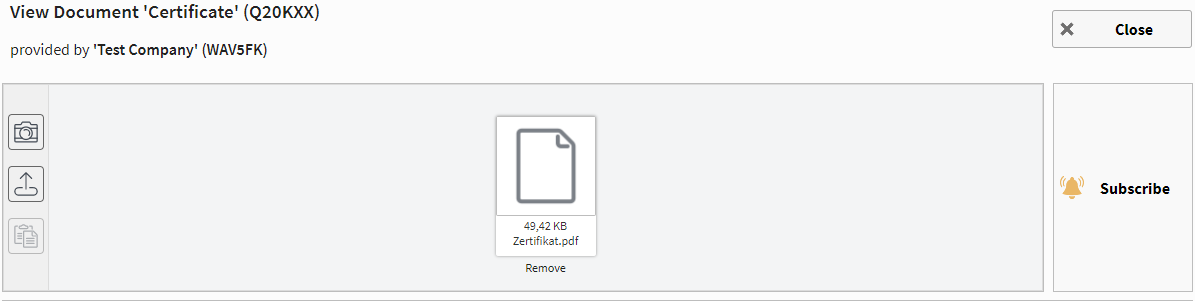
Subscribe to a Document
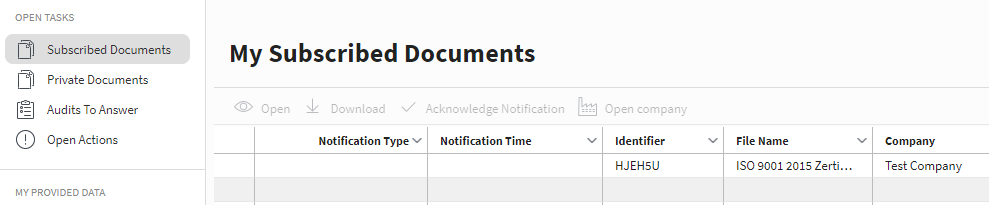
Overview of subscribed Documents
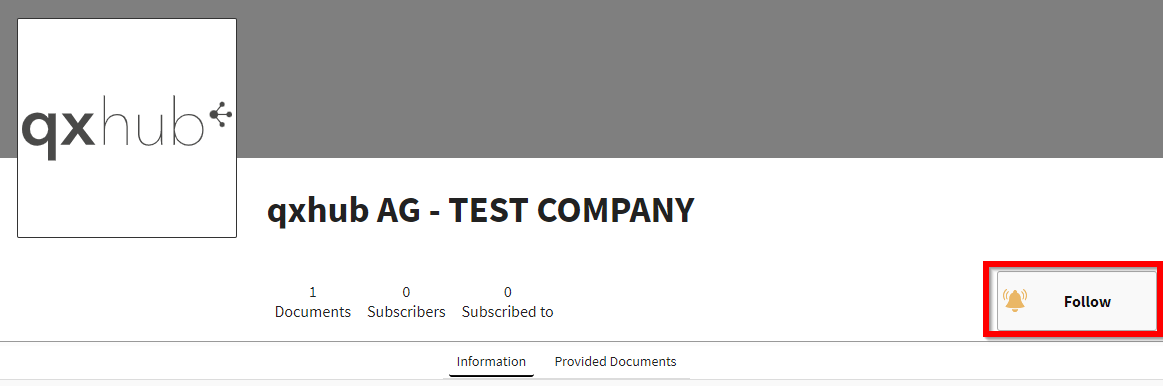
Follow a Company

Content
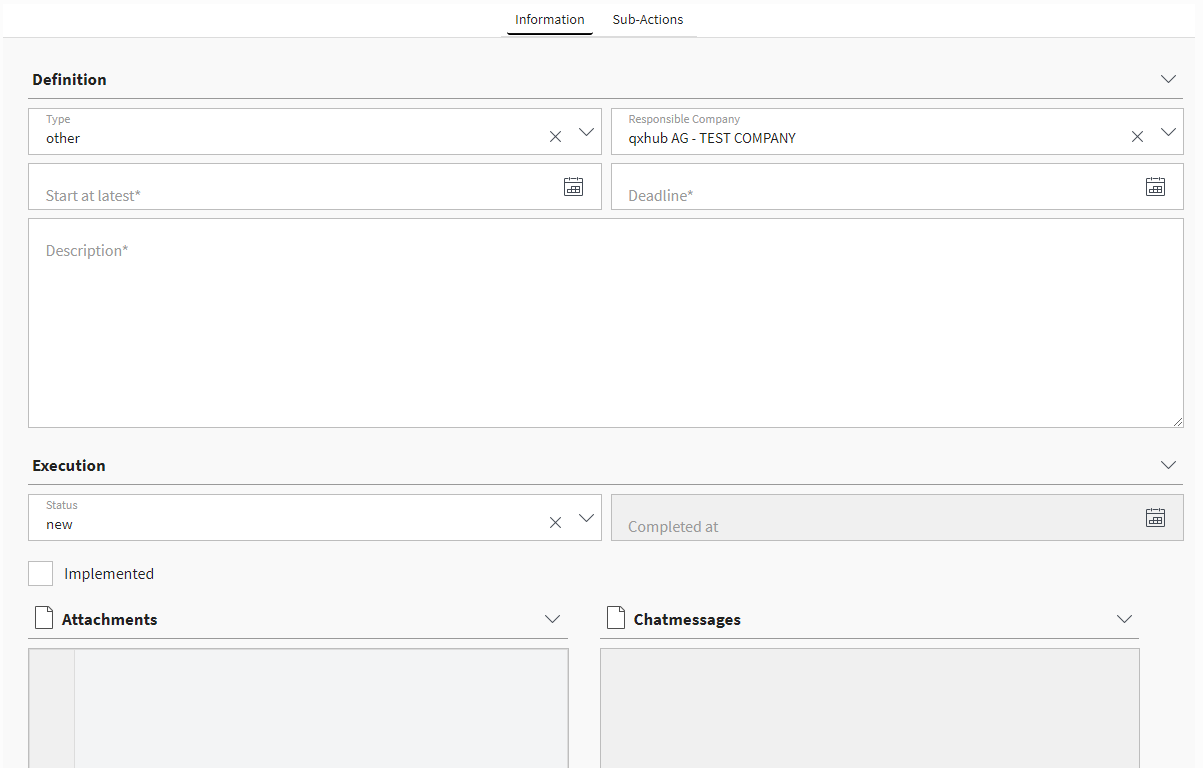
Edit Actions
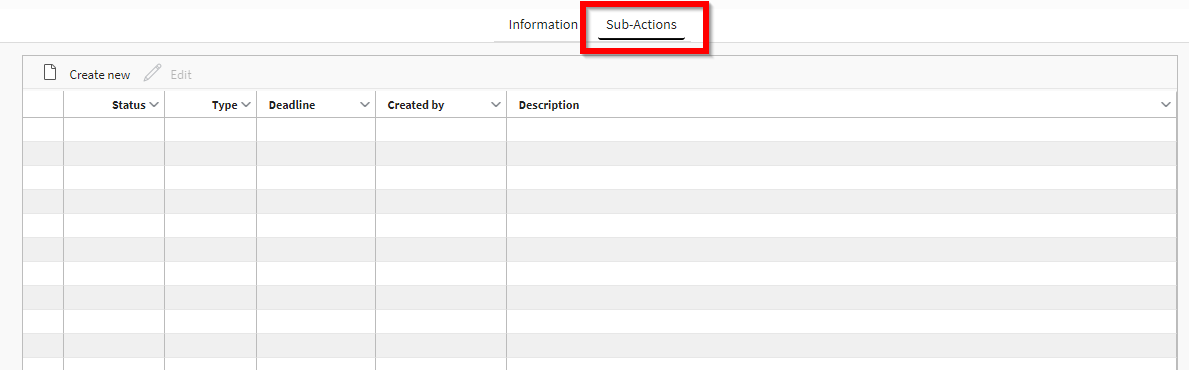
Define Sub-Actions
Content
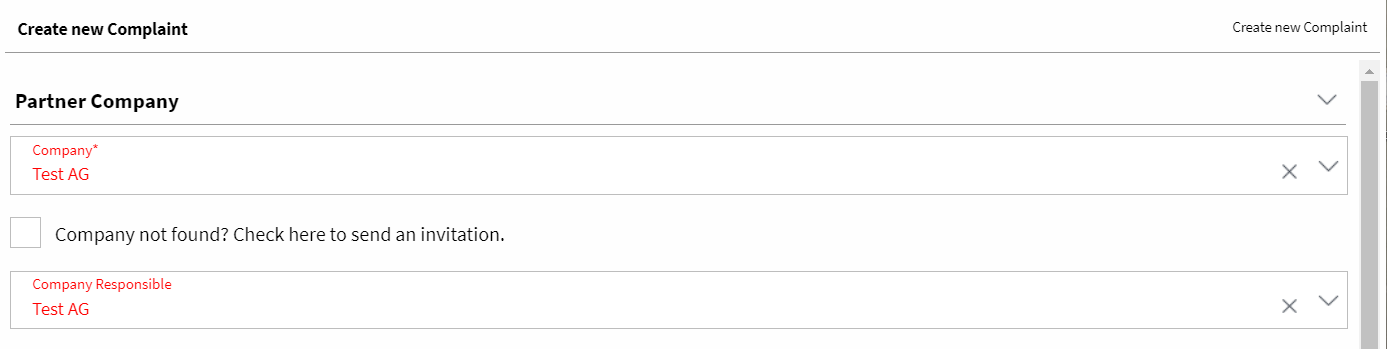
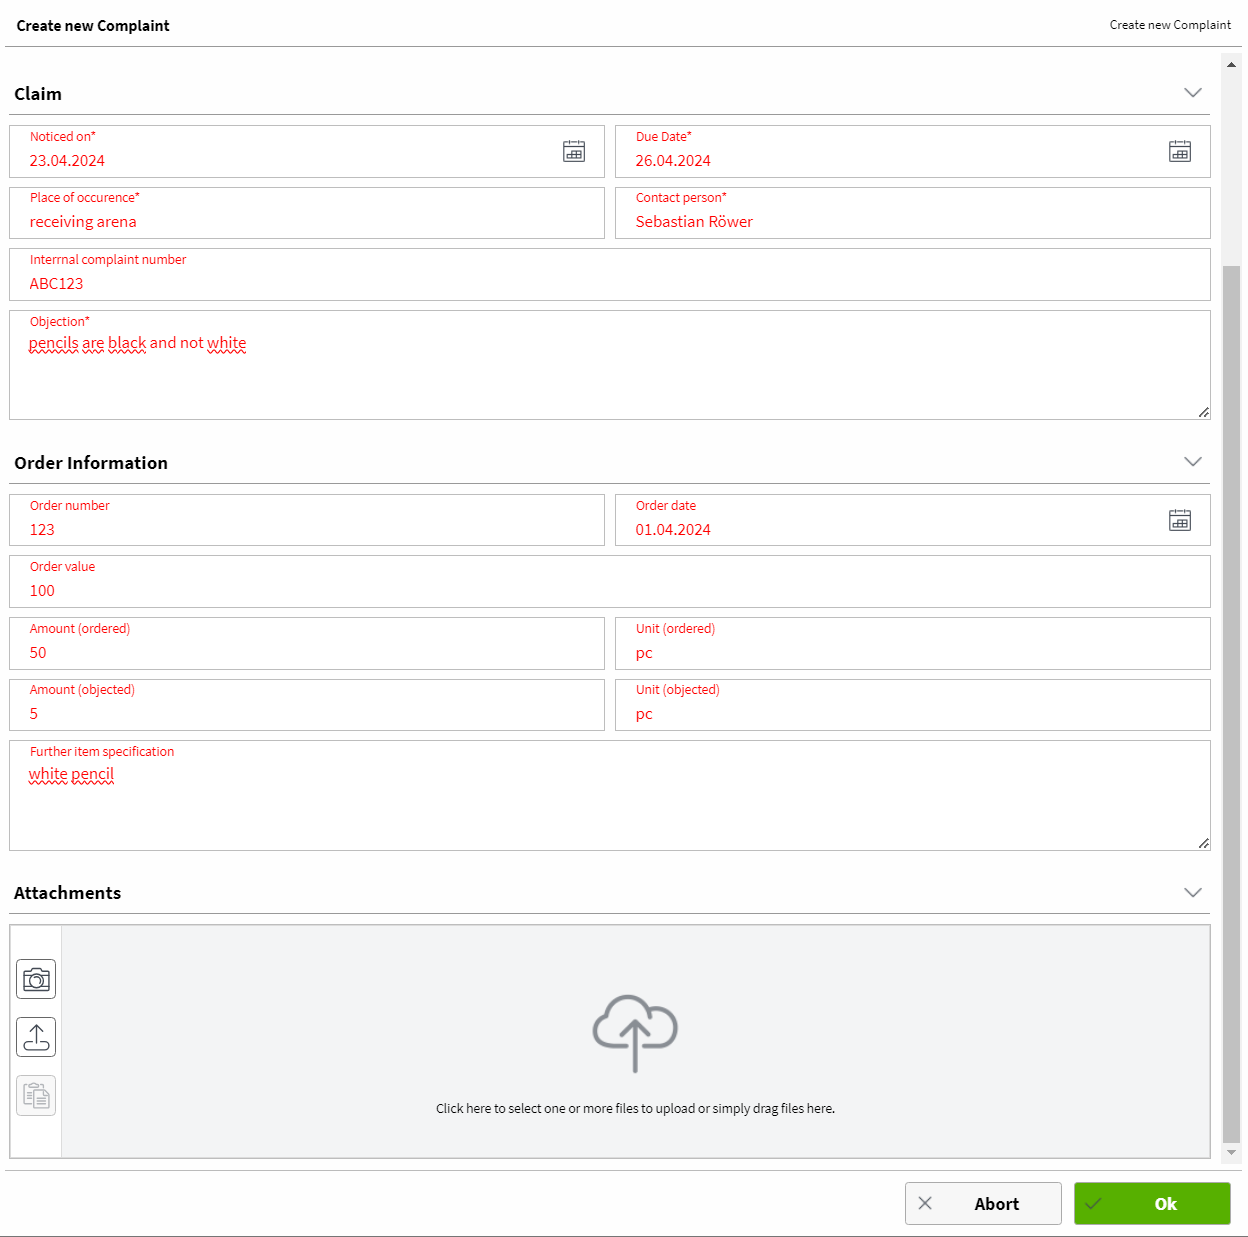
Create Complaints
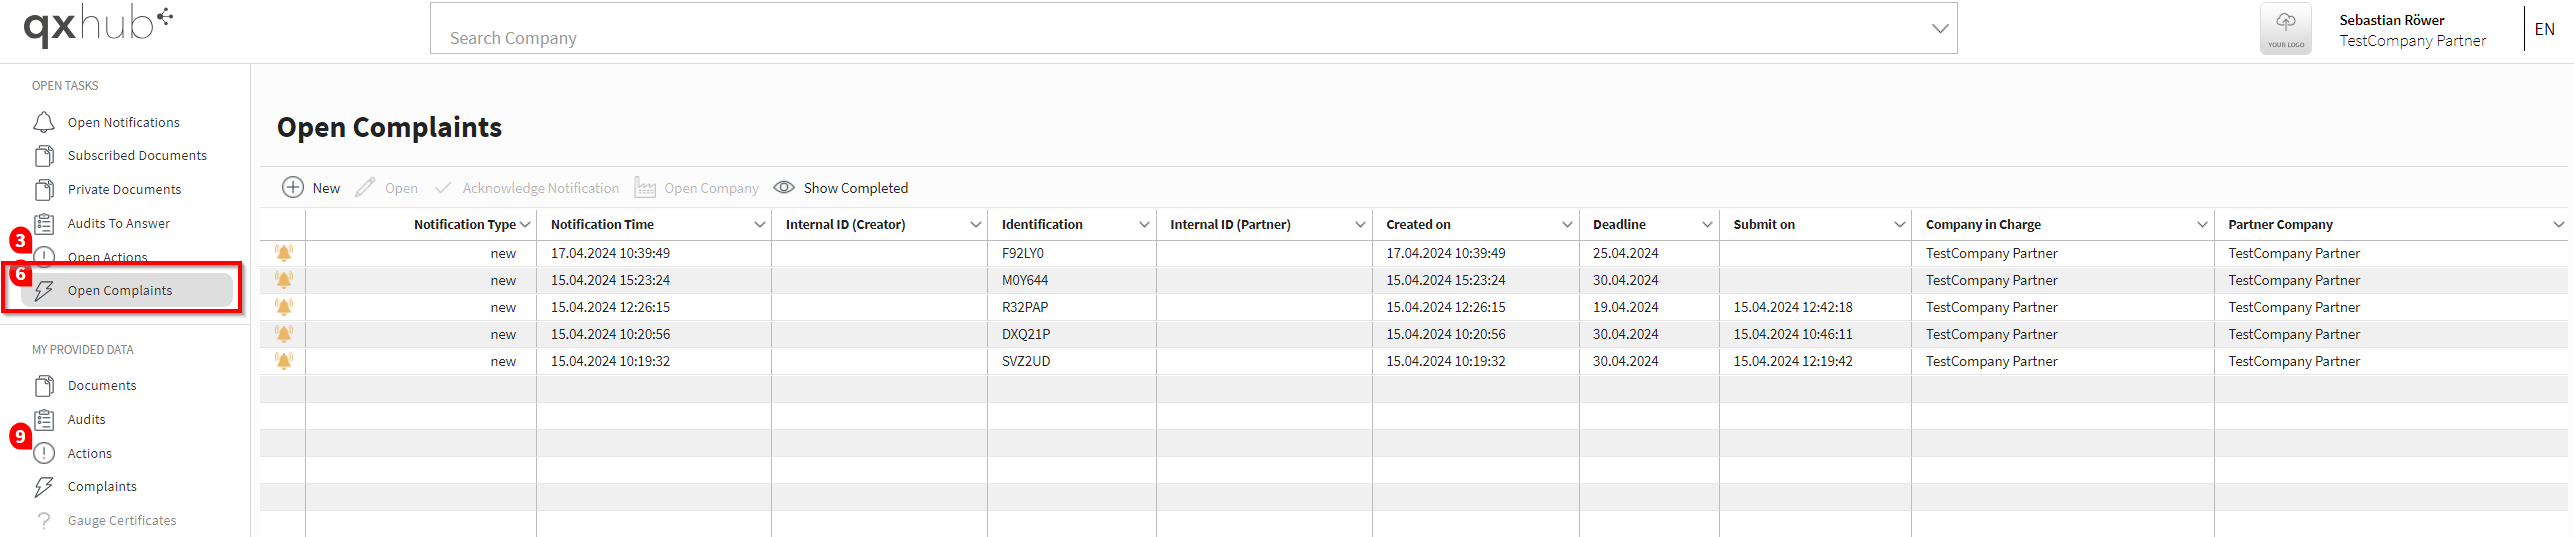
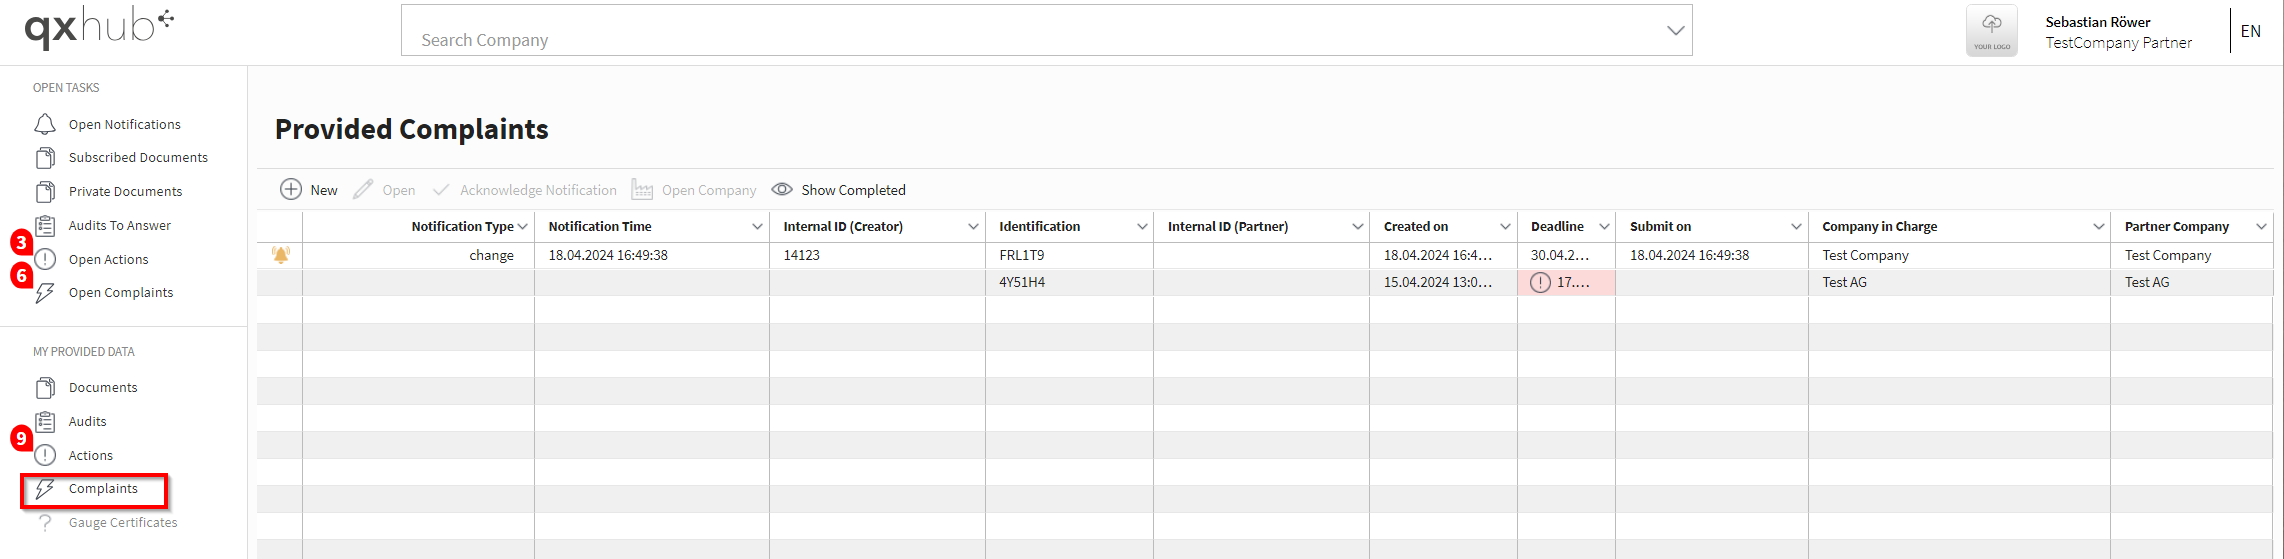
Manage existing Complaints
Content
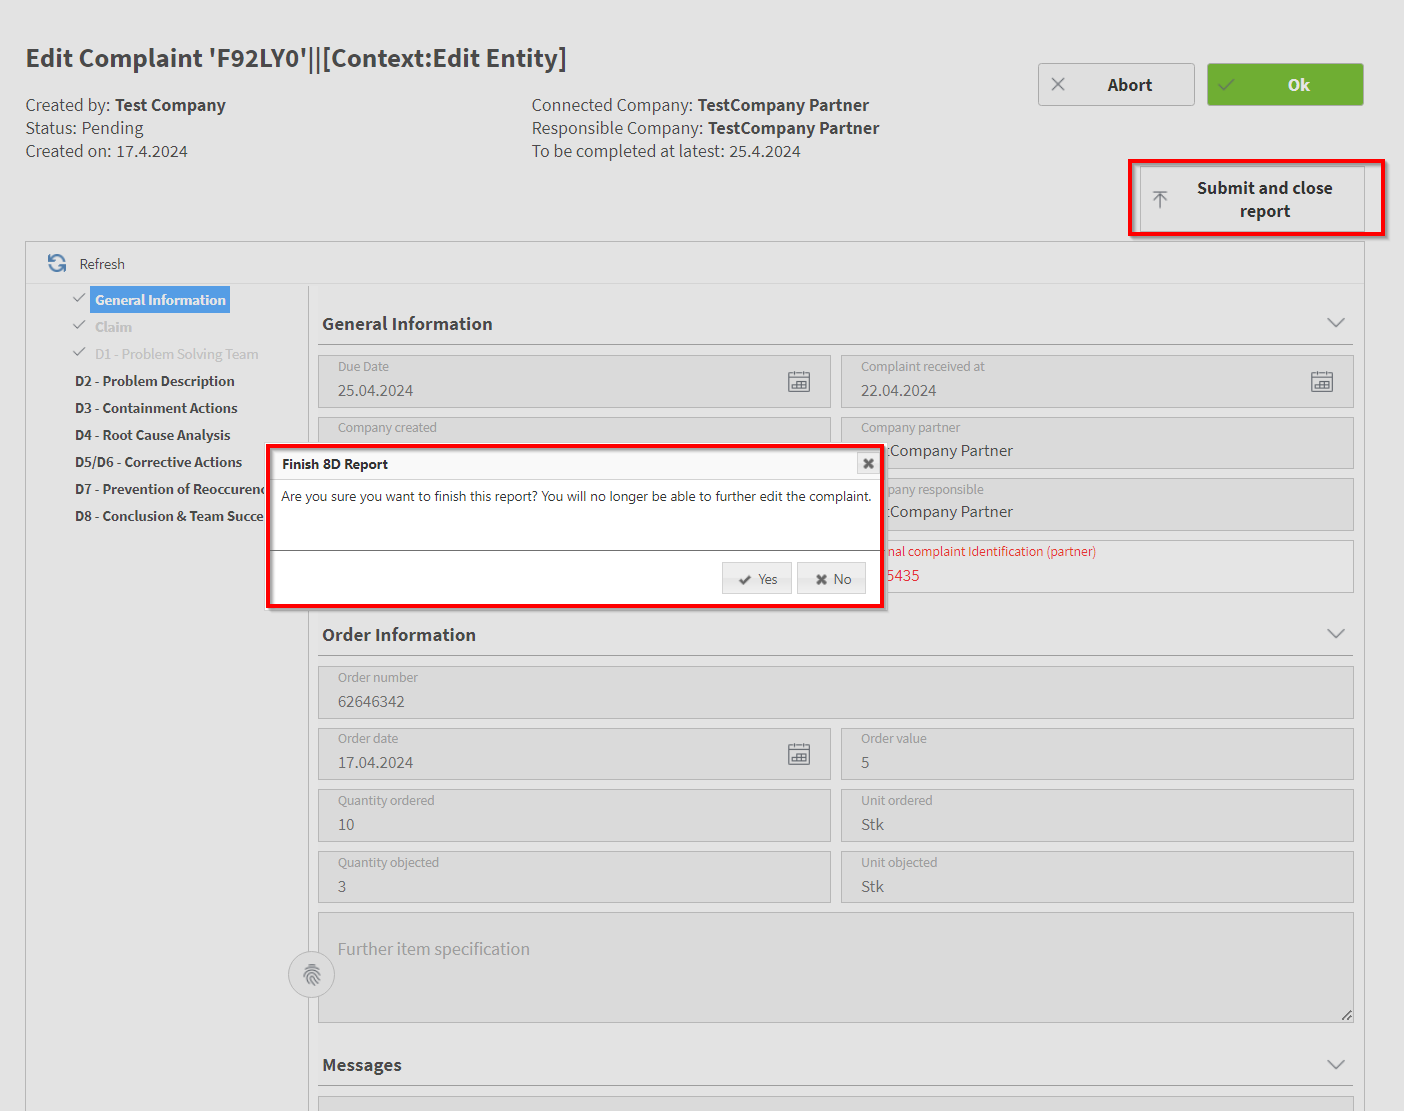
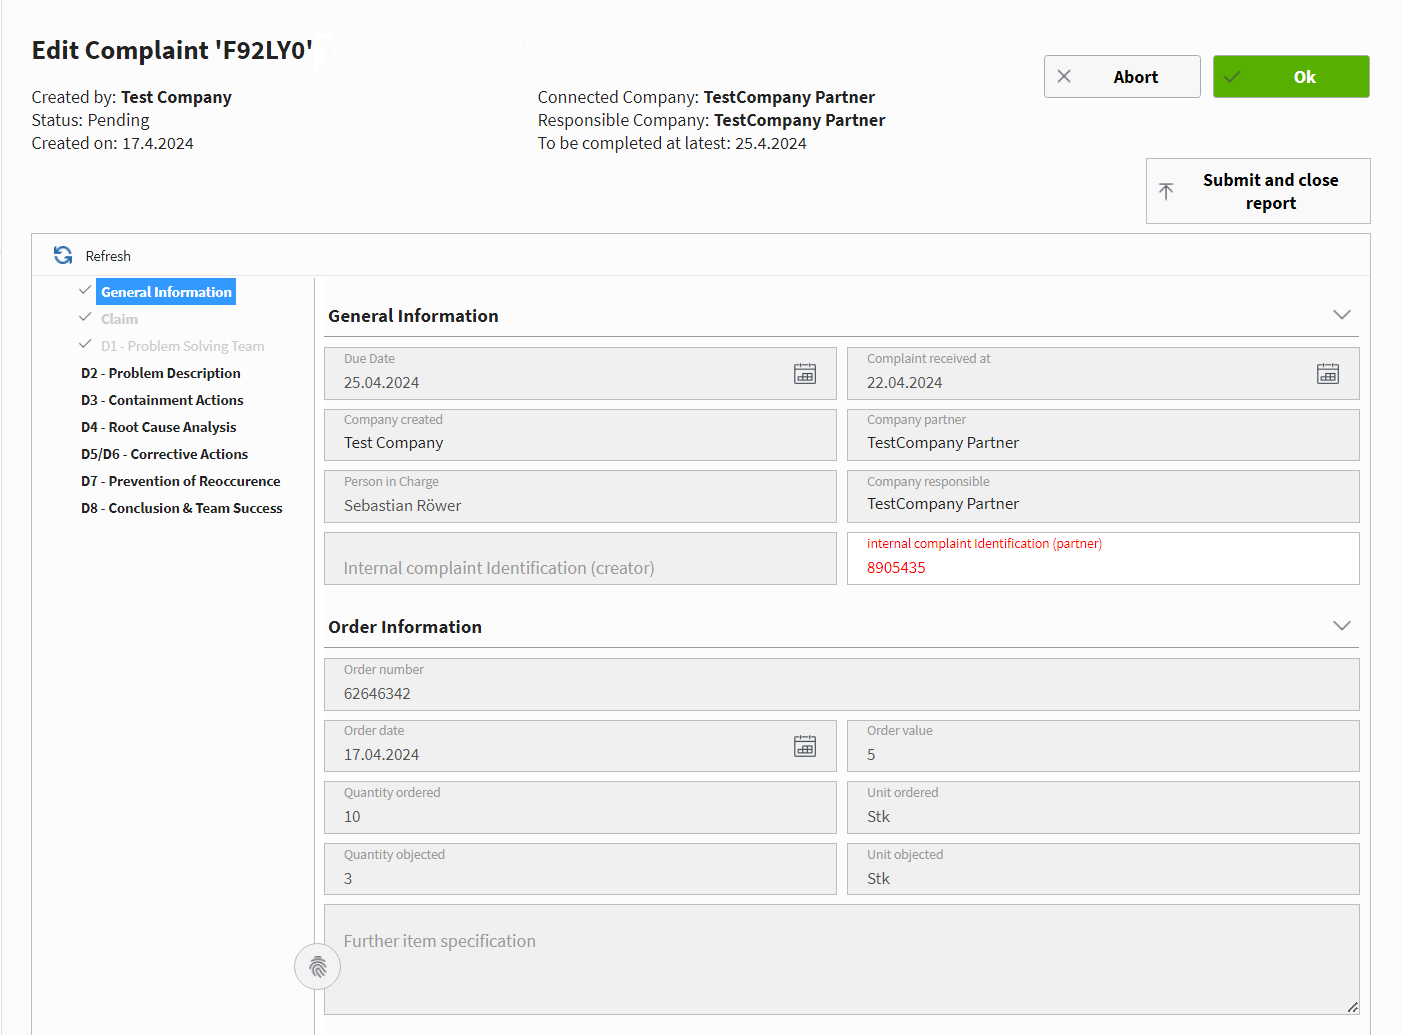
Edit Complaint
Submit Complaint